How to Add a Logical Partition in Windows 8
2014-01-08
There is normally a single hard driver in a new computer, and there is only a one partition was set by default. so there is only a C: driver you can see.
Now we need to “split” the single hard driver to 2 partitions because we need a D: driver as a logical partition in our system.
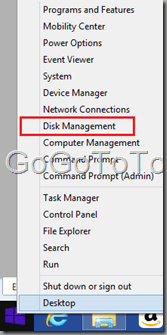
Right click the new Windows 8.1 start button on the left bottom corner, select “Disk Management”
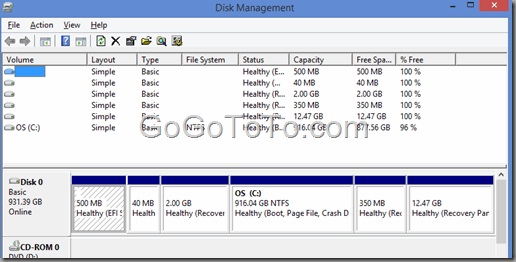
 This is a new computer, there is only a hard driver: Disk 0. Although it was separated to multiple partitions by computer maker and Windows 8 system, but for user, there is only a C: drive in the system, now we want to arrange some space to our new logical partition D:
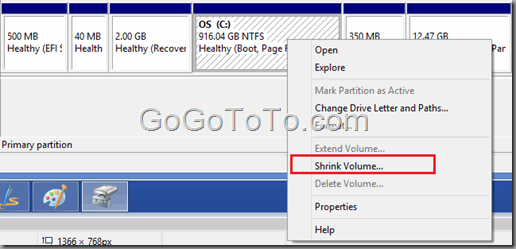
 Move mouse point on C: drive, right click, and select Shrink Volume…, this will reduce existing partition size so that we can arrange left space to new logical partition.
 Input a number which you want reduce how much size you want to “cut” from current partition (actually you just think how much size you want to leave for your C: driver is, you can see new C: size from **Total size after shrink in MB** ), after you input a number you want, click Shrink button to start the reducing process.
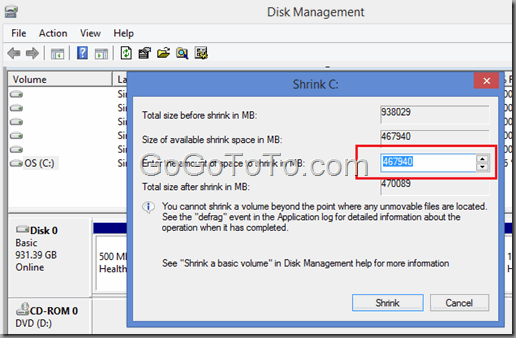 Soon after, you will see C: partition was split to 2 partitions: C: and a unallocated partition.
 Right click the Unallocated partition and select New Simple Volume…
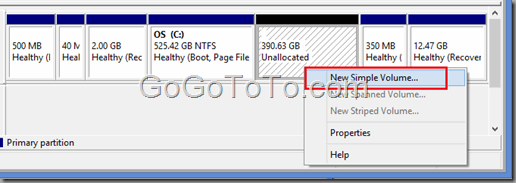 This will start a New Simple Volume wizard, just follow the wizard to create a new logical partition, it set a driver letter for you, but if you have installed an optical driver, the new logical partition drive letter is E: but not D: because D: has been assigned to your optical driver, just let the wizard set E: first, later you can change driver letter.
You almost do not need to change any steps in Wizard, finally you will get new partition like the following showing:
This will start a New Simple Volume wizard, just follow the wizard to create a new logical partition, it set a driver letter for you, but if you have installed an optical driver, the new logical partition drive letter is E: but not D: because D: has been assigned to your optical driver, just let the wizard set E: first, later you can change driver letter.
You almost do not need to change any steps in Wizard, finally you will get new partition like the following showing:
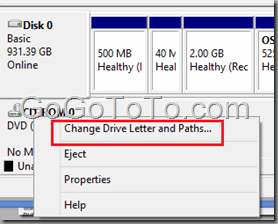
 If you want to change partition driver letter, you have to change your optical driver letter first, so that the D: letter is available to assign to logical new partition which you created just now.
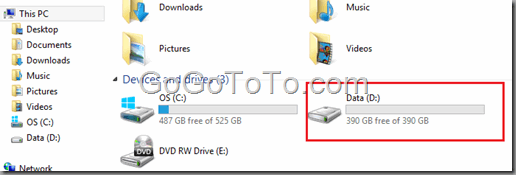
 After we finished all above steps, we can open Windows Explore to confirm our new logical partition (D: driver) is available: